Yaay! My first crafting post! Thanks for checking out my new blog. I hope to post different projects on here at least once a week. We'll see how that goes!
My good friend Erica had a birthday this past week, so I wanted to come up with a thrifty, unique, personalized gift for her. I don't know about you, but it's always a difficult task for me to pick out my friend's presents. Unless you have a lot of money to spend, it's always so hard to pick out something special that they may actually want or need! I thought this year I would just MAKE her something special.
I've seen several different blog posts by different people on how to make homemade coasters. Every one was done a little differently but the idea was generally the same. It seemed easy enough so I figured I would give it a shot!
I bought 5 ceramic tiles from Lowes (16 cents a piece!), some cute scrapbook paper from Hobby Lobby (which I might add, was 50% off so I got that for about 25 cents a sheet), and I already had some Mod Podge and acrylic sealer on hand at home.
I traced my tiles onto the scrapbook paper and cut my paper slightly smaller than the tiles (so the paper wouldn't overlap). Then I drew an E on the bottom corner of each tile using a brown crafting marker I had on hand. I then sprayed each paper with an aerosol acrylic sealer, just in case the Mod Podge would make my marker run.
Once the papers were dry, I covered each tile with a nice coat of Mod Podge and slowly smoothed the paper on. I let that dry and then brushed on a few coats of Mod Podge over the top (letting them dry completely between each coat). When the Mod Podge was dry, I sprayed another coat of the acrylic spray on top just to seal it in.
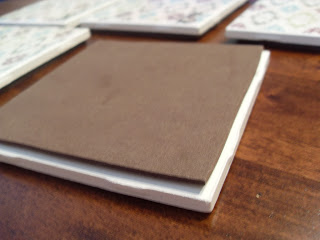
Most people have used felt glued on the back of the tiles to prevent scratching furniture, however, I did not have any felt on hand. I did have a large piece of brown foam paper though so I figured, why not use foam? I cut a square out for each tile and hot glued the foam to the backs of the tiles....and VOILA! You have a beautiful homemade gift!
I was really happy with how these turned out and I definitely plan on making more of these in the future. It cost me less than $5 to make these! That's what I'm talking about! I gotta make some for myself!
Well, thanks again for checking in! Happy crafting!


I'm glad you posted this. I'm going to a housewarming party next weekend and this is the perfect gift, and I really like the phone idea better, looks nicer =) Thanks so much!!
ReplyDeleteI make these myself all the time for gifts & friends. My one question that I have how does it hold up to moisture?
ReplyDeleteThe ones I make I use lacquer on mine that way I can insure that the paper won't get ruined.
Since I haven't made any for myself, I'm not totally sure of the life span of these coasters. They definitely are not meant to be abused and totally saturated, but should hold up fine if taken care of properly. I've actually been giving them a few coats of the acrylic sealer to help protect them and prolong the life span.
ReplyDelete